How to Use a Cricut Mug Press With Sublimation
Here's how to use a Cricut Mug Press with sublimation: wrap a sublimation or Infusible Ink design tightly around the mug, tape the edges flat, and press it in the machine's one-touch setting until the cycle finishes. Let the mug cool before peeling the paper, and the print will be permanent.
On this page (9 sections)
- How do you prepare a mug for sublimation pressing?
- What does the Cricut Mug Press actually do during a cycle?
- How to use a Cricut Mug Press with sublimation in five steps
- Which mug and materials should you use?
- How do you control heat and time without dials?
- How do you peel the paper and keep the print sharp?
- What mistakes cause faded or peeled mug prints?
- How do you keep sublimation mugs looking new?
- What's the simplest way to start pressing mugs?
Here's how to use a Cricut Mug Press with sublimation: wrap a sublimation or Infusible Ink design tightly around the mug, tape the edges flat, and press it in the machine's one-touch setting until the cycle finishes. Let the mug cool before peeling the paper, and the print will be permanent.
The press is built for this job. It removes the guesswork of dials and pressure settings, so your main work is in the wrap and the cooling.
Get those two steps right and the mug comes out with a print that survives the dishwasher.
How do you prepare a mug for sublimation pressing?
Start by cleaning the mug blank and preheating it briefly so the design bonds evenly. Wipe the surface with a lint-free cloth to remove dust and fingerprints.
Cut or print your design mirrored, then wrap it around the mug with the printed side against the coating. Tape each edge flat and pull the paper snug so no air pockets sit under the design.
A loose wrap is the most common reason a print looks washed out. Run your thumb around the seam and smooth any lifted corners before the mug goes into the press.
One more check before you load the mug: make sure the paper covers the full area you want printed. Any bare spot under the wrap will stay blank, because the sublimation ink only travels where the printed paper touches the coating.
Trim the paper so it sits just inside the mug's top and bottom edges without folding over the rim.
What does the Cricut Mug Press actually do during a cycle?
The press applies preset heat and pressure for a set time, with no manual temperature or pressure settings. Its patent-pending heat plate uses zone heating to keep results consistent around the mug.
Cricut rates the press up to 400°F and lists it for blanks from 11 oz to 16 oz. That range covers standard coffee mugs and most sublimation blanks sold for crafting.
The one-touch setting means the same cycle covers Infusible Ink sheets, pens, markers, and sublimation prints. You close the lever, wait for the signal, and release.
For a deeper look at how machines like this work, see what is a heat press.
Because the press controls both heat and time, there is no dial to match to your blank. The zone heating is what keeps the top and bottom of the design as vivid as the middle.
A flat press can struggle with that curve, which is why a dedicated mug press is the easier route for a round surface.
How to use a Cricut Mug Press with sublimation in five steps
Clean, wrap, press, cool, and peel is the whole process. Follow this order and you avoid the faded or peeled prints that come from rushing.
- Wipe the mug and preheat it briefly in the press.
- Wrap the mirrored design tight against the mug and tape all edges flat.
- Load the mug and close the lever on the one-touch setting.
- Wait for the press to signal that the cycle is done, then release.
- Let the mug cool fully, then peel the paper slowly.
The press handles the heat and time. Your job is the wrap quality and the patience to let the mug cool.
The machine's auto-off safety feature also means you don't need to babysit it between mugs.
If you plan to press several mugs in a row, wrap the next blank while the current one cools. That keeps the machine in steady use without handling a hot mug before it is ready.
Which mug and materials should you use?
Use mugs coated for sublimation, from 11 oz to 16 oz. Plain ceramic without a sublimation coating won't hold the ink, and a thin or chipped mug can crack under the heat plate.
Cricut's Infusible Ink sheets, pens, and markers are sold separately from the press. Third-party sublimation paper and ink work too, as long as the mug blank is made for sublimation.
The bundle includes the Mug Press plus 12 blank ceramic mugs at 12 oz each. That size falls inside the press's 11 oz to 16 oz range, so beginners can start pressing the same day.
If you plan to press a lot of mugs, keep a spare blank or two on hand. A cracked or smudged mug means starting the wrap over.
How do you control heat and time without dials?
You don't set heat or time on a Cricut Mug Press. The machine runs its own preset cycle, so there's nothing to adjust for a standard mug.
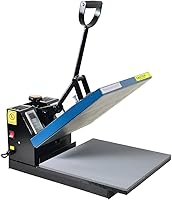
That matters when you compare it with a flat heat press. A flat press needs a temperature and time you set yourself, which is why mug settings there follow a different logic.
Our guide to sublimation temperature and time explains how those settings vary by material.
If your mugs come out faded even with a tight wrap, the press may need a software update. Here's how to update firmware on cricut mug press when results slip or the cycle behaves oddly.
How do you peel the paper and keep the print sharp?
Let the mug cool completely before peeling. Peeling while hot can pull ink away from the coating and leave a dull patch.
Set the mug on a heat-safe surface and wait until it feels room temperature to the touch. Then peel the paper slowly from one edge, keeping the paper flat as it comes away.
If a corner sticks, don't scrape it with a knife. Warm the spot with a hair dryer on low for a few seconds and try again.
Cricut says pressed Infusible Ink mugs are peel-proof and dishwasher safe. Give a fresh mug a day before its first wash to be safe.
Check the peel in bright light so a faint corner of paper doesn't get missed and washed into the design later.
When should you add a PTFE sheet to your setup?
A PTFE sheet is optional on the Mug Press but useful when you press with a flat press or protect your work surface. The YRYM set gives you three reusable sheets that resist heat up to 600°F.
Each sheet measures 16 x 20 inches, and you can cut one down to fit smaller tasks. Wipe them clean after use and they stay reusable for many projects.
The nonstick surface also wipes off glue, wax, or clay, so the same sheet can double as a craft mat between pressing sessions. It is waterproof and washable, which makes cleanup quick after a messy wrap or a transfer that left residue behind.
When is an infrared thermometer worth adding?
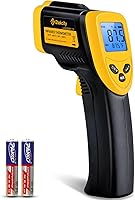
An infrared thermometer helps if you press on more than one machine and want to compare surface heat. The Etekcity 774 reads from -58°F to 842°F with a 12:1 distance-to-spot ratio.
Hold it about 14 inches from the target and it shows a reading in under half a second on its backlit LCD. It's not a substitute for the Mug Press's preset cycle, but it's handy when you also run a flat press.
Keep in mind that the reading is the average temperature of the circular area the sensor targets, not a single point. That is fine for comparing one press against another.
It also shows a maximum temperature so you can see how hot a surface got after a cycle.
What mistakes cause faded or peeled mug prints?
Loose paper, short pressing, and peeling too soon cause most failures. Each one is easy to fix once you know what to look for.
- Paper lifting at the seam leaves a pale streak along the edge.
- A mug loaded before the press is warm can press unevenly.
- Pulling the mug out early cuts the cycle short and weakens the bond.
- Peeling while hot can tear the print or leave a cloudy finish.
Check your wrap in good light before closing the lever. A flat seam and even pressure do more for print quality than any extra heat.
If a mug still comes out weak after a tight wrap and a full cycle, press it a second time rather than adding tools or guessing at settings.
How do you keep sublimation mugs looking new?
Wash by hand when you can, and skip harsh scrubbers to keep the coating smooth. A soft sponge and mild dish soap are enough for everyday cleaning.
Cricut backs the Mug Press with a 1-year manufacturer warranty and lists UL, CSA, FCC, and IEC conformity. Treat the machine well and it should handle many mug batches.
Store finished mugs without stacking them rim to rim, since a chip on the coated edge can't be pressed back. For other pressing projects, our guide to how to heat press a hoodie shows how a flat press handles fabric designs.
What's the simplest way to start pressing mugs?
For most beginners, the Cricut Mug Press plus its bundled blanks is the easiest way to learn how to use a Cricut Mug Press with sublimation. The preset cycle removes the settings work, so you can focus on a tight wrap and full cooling.
Pick the bundle if you want blanks included and a short learning curve. Add the PTFE sheets if you also press on a flat machine and want to protect its surface.
Skip the extra tools at first, and press a test mug before you commit to a set of gifts.
Frequently asked questions
What temperature does a Cricut Mug Press run at?
The press has no temperature dial. It runs a preset cycle up to a top rating of 400°F and applies the pressure through its heat plate, so the machine controls both heat and time for you.
That is why the same one-touch setting works across 11 oz to 16 oz blanks.
Do you need to mirror a sublimation design for mugs?
Yes. Sublimation paper transfers in reverse, so mirror the artwork in Design Space before cutting or printing it.
If you skip this step, text and photos come out backwards on the mug even though the press cycle is correct.
Is a Cricut Mug Press mug dishwasher safe?
Cricut says mugs pressed with Infusible Ink come out peel-proof and dishwasher safe. For third-party sublimation mugs, follow the mug blank's own care guidance.
A full cooling period before peeling and washing matters more than any single setting.
How long does a mug press cycle take?
The Cricut Mug Press runs a short one-touch cycle of a few minutes and signals when it finishes. Wait for that signal rather than pulling the mug early.
A design pressed for too little time looks faded and can peel after washing.
Why did my sublimation print come out faded?
Faded prints usually come from loose paper edges, a mug that wasn't preheated enough, or peeling while the mug was still hot. Tape every edge flat, let the mug cool fully before peeling, and press again if the print still looks weak.