How to Heat Press a Hoodie the Right Way
To learn how to heat press a hoodie, follow the transfer instructions, pre-press if allowed, and keep seams, pockets, and drawstrings clear of the design. Use a pressing pillow when garment bulk blocks even contact.
On this page (8 sections)
- How do you heat press a hoodie step by step?
- What settings should you use to heat press a hoodie?
- How should you position a hoodie on the platen?
- When does a pressing pillow help with a hoodie?
- What should you check before the first press?
- What should you do after pressing a hoodie transfer?
- What mistakes can spoil a hoodie transfer?
- How to heat press a hoodie: which setup should you choose?
To learn how to heat press a hoodie, follow the transfer maker's temperature, time, and pressure instructions, then place the design on a flat area clear of bulky seams and drawstrings. Pre-press if the transfer instructions allow it, and add a pressing pillow if garment bulk keeps the platen from reaching the design evenly.
Hoodies need careful positioning because pockets, seams, zippers, and cords can interrupt platen contact. The right settings depend on both the transfer and the fabric, so don't rely on one temperature for every project.
How do you heat press a hoodie step by step?
Prepare the garment, clear the pressing area, and apply the transfer using its stated settings. Keep raised features away from the design so they don't interfere with pressure.
- Check the hoodie care label and the transfer maker's application instructions.
- Smooth the garment and position the design before heating.
- Thread the hoodie over the lower platen if your press allows it.
- Place a pressing pillow beneath the design if seams or a pocket edge block contact.
- Set temperature, time, and pressure as directed for the transfer and fabric.
- Press, then peel the carrier as directed by the transfer maker.
- Check the design edges and follow the instructions for any second press.
Keep the transfer centered and away from drawstrings, zipper teeth, and thick seams. For more on garment positioning and pressing, see our step-by-step guide to heat pressing a shirt.
What settings should you use to heat press a hoodie?
Use the settings specified for your exact transfer and fabric combination. HTV, sublimation, and different hoodie blends can call for different heat, time, and pressure.
Don't choose settings based on the hoodie alone. Check the vinyl or transfer instructions, then confirm the garment can handle that heat using its care label.
For HTV, use our guide to HTV heat press temperature and time. If you're using sublimation, read sublimation temperature and time on a heat press before you start.
How much pressure does a hoodie need?
Use the pressure specified by the transfer maker and keep bulky garment features out of the platen's path. A trapped seam can prevent even contact, even when the press is adjusted correctly.
Pressure varies by press and transfer. Our guide to heat press pressure settings explains how to choose pressure without guessing one setting for every project.
How should you position a hoodie on the platen?
Center the design on a flat section of fabric, then move seams, pockets, and cords clear of the pressing area. A threadable lower platen can help by letting you slide one side of the hoodie over the plate.
Before pressing, check that the garment lies flat and isn't caught under the platen edge. For a front design, keep the hood and back fabric out of the pressing area.
A hoodie pocket can create a raised edge across the front. If the design sits above or near the pocket, place a pressing pillow inside the garment to raise the print area and keep pocket bulk below the platen.
When does a pressing pillow help with a hoodie?
Use a pressing pillow when a seam, pocket, zipper, or drawstring would otherwise sit beneath the design. The pillow raises the fabric area so bulky parts don't crowd the transfer.
Place the pillow inside the hoodie and position the design over it. Make sure the pillow fits within the platen and that no raised cord or seam crosses the design.
The VCHOMY 16x20 Extra Large Pressing Pillow has a Teflon-coated surface and measures 16 x 20 inches. It suits broad pressing areas, but skip it if it won't fit your press or the design is much smaller than the support area.
Which pressing pillow size should you use for a hoodie?
Choose a pillow that supports the transfer area and fits within your press. A smaller pillow can be easier to position under a small design, while a larger one suits a wider print area.
The VCHOMY Heat Press Pillow Bundle includes four sizes: 5 x 5, 10 x 10, 5 x 15, and 12 x 15 inches. It suits crafters who work on varied design sizes or narrow garment sections.
Skip the bundle if you only need one size and don't want to store the others.
Check that the pillow sits flat and fully within the pressing area. Don't stack pillows unless the press and pillow instructions allow it.
What should you check before the first press?
Confirm that the garment, transfer, and press instructions agree on the settings. Check the care label, remove loose lint, and make sure the design is in the right place before closing the press.
A quick pre-press may flatten the fabric and remove moisture, but do it only if the transfer maker allows it. Keep the press open when you aren't pressing, and handle the hot platen carefully.
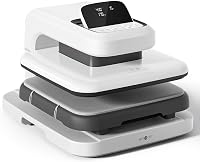
The Delclynee 15x15 Slide-Out Clamshell suits a home crafter or small shop that wants a threadable work area and a pull-out lower platen. Its lower platen extends up to 12.25 inches, and the top platen has an auto-leveling floatation feature for uneven or thicker materials.
At 41 pounds, it may not suit a workspace where you need to move the press often.
Measure your workspace and the garment before choosing a press. If you need more options for thick clothing, compare heat presses for hoodies.
What should you do after pressing a hoodie transfer?
Peel the carrier and check the design only as the transfer maker directs. Some transfers call for a hot peel, while others need to cool first.
If an edge lifts, don't keep pressing at random settings. Recheck the instructions and make sure the platen contacted the design without a seam or pocket in the way.
Let the garment cool as directed before wearing or washing it. Follow any wash-care instructions that came with the transfer.
What mistakes can spoil a hoodie transfer?
Guessed settings and bulky features beneath the design are common causes of poor transfers. Correct the setup before applying heat instead of trying to fix the result with extra time.
- Using a generic setting: Match temperature and time to the transfer and fabric.
- Pressing over a seam: Reposition the hoodie or use a suitable pillow.
- Leaving drawstrings under the platen: Move cords outside the pressing area.
- Skipping placement checks: Smooth the garment and confirm the design position before closing the press.
- Assuming every transfer peels the same way: Follow the specific peel instructions.
If the hoodie is polyester or a blend, read our guide to heat pressing polyester without scorching it. Follow the garment and transfer instructions closely.
How to heat press a hoodie: which setup should you choose?
Choose settings from the transfer instructions, then add a pillow when garment bulk blocks even contact. Keep the design area flat, clear of seams, and within the platen.
Pick the VCHOMY 16x20 pillow for a broad design area, or the 4-pack if you need several sizes for different placements. Consider the Delclynee press if its slide-out platen and garment threading space fit your workspace.
For a wider view of machine formats and sizes, read the heat press guide.
Frequently asked questions
What temperature should I use to heat press a hoodie?
Use the temperature and time specified by the transfer maker for your exact transfer and hoodie fabric. HTV and sublimation have different requirements, and polyester blends may need a different approach from cotton.
Check the garment care label before applying heat.
Do you need a pressing pillow for a hoodie?
A pressing pillow can help lift the transfer area above thick seams, pockets, zippers, or drawstrings so the platen presses the design area more evenly. Choose one that fits beneath the design and within the press.
Follow its temperature and care instructions.
How do you keep hoodie seams from interfering with a heat press?
Thread the hoodie over the lower platen when your press allows it, so only one fabric layer sits beneath the design. A pressing pillow can raise a flat area above bulky seams or a pocket edge.
Keep cords and other raised parts outside the platen.
Should I pre-press a hoodie before applying HTV?
A brief pre-press can flatten the fabric and remove moisture before applying HTV, but follow the vinyl maker's instructions for duration and temperature. Smooth the hoodie first and let the fabric settle.
Avoid prolonged heat, especially on blends that may be heat-sensitive.